How fast can I make my first event floor plan?
In less than 2 minutes! Here’s a step-by-step guide to help you access your account, create an event floor plan, and send it to your clients.
In this ‘How-to’ post we show you all the steps to create an event floor plan diagram and send it to your clients using EventReception’s awesome event software.
To review the steps for any specific action, click on the hyperlinks below.
At the end of the post, we have a video showing the process in real-time. From your initial login to your EventReception account, to the final step of emailing your clients their event diagram, it takes less than 2 minutes.
Five Steps
Step 1. How to login
To log in to your corporate account:
- a. Type in the web address (URL) we have created for your company, for example, yourCompany.eventreception.com.

Step 1a. Insert your url in Google Chrome - b. Enter your company’s access codes (username & password).
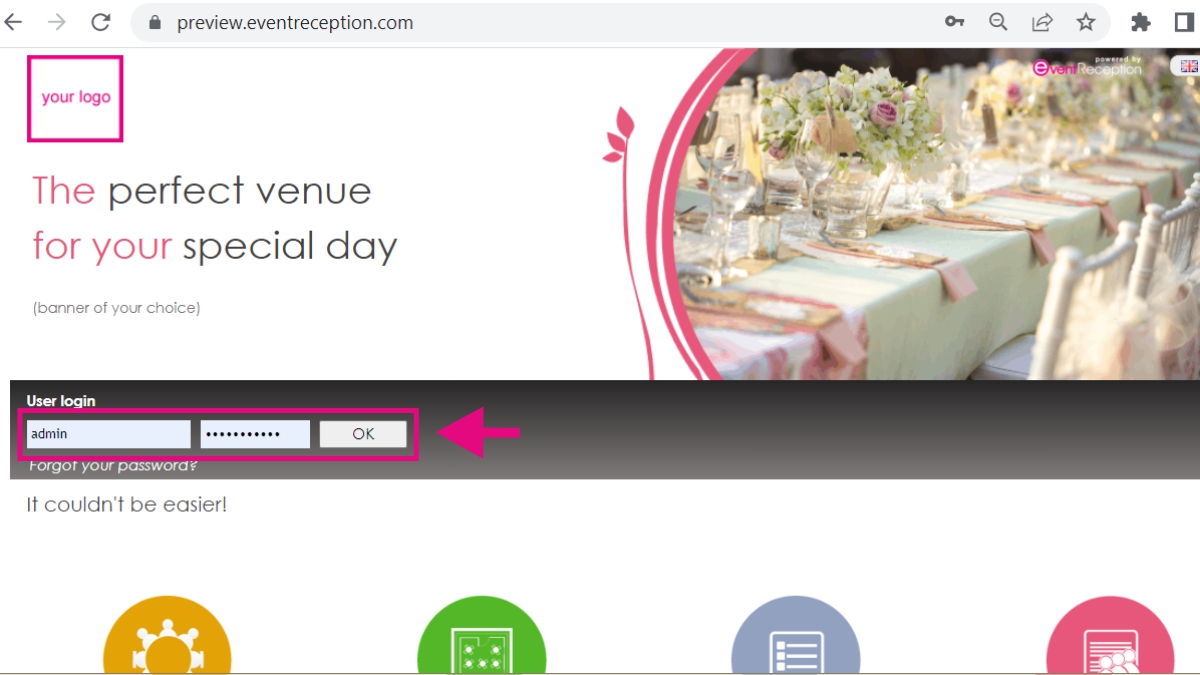
Having successfully inserted your corporate details, you will find yourself in your Events control panel (Event Dashboard).
If you are logging in to your account for the first time, the Event Dashboard will either be empty or it will have a Demo Event we have created for you.Step 2. How to create a New Event
a. From your Event Dashboard, click on [New Event].
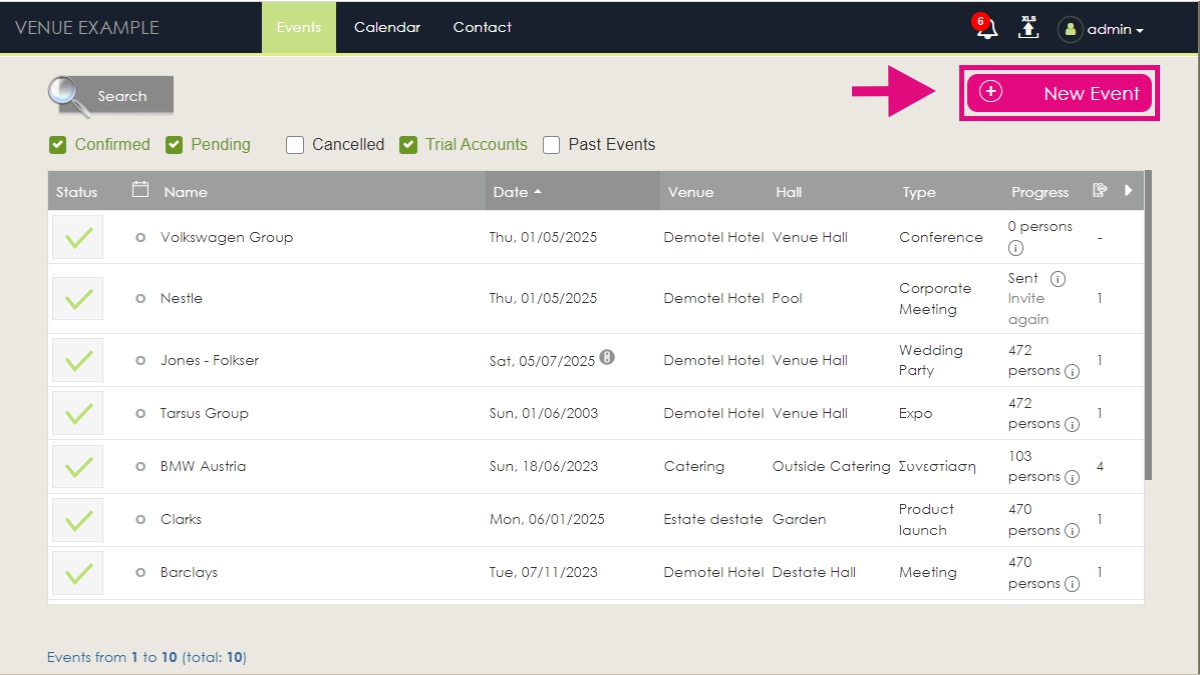
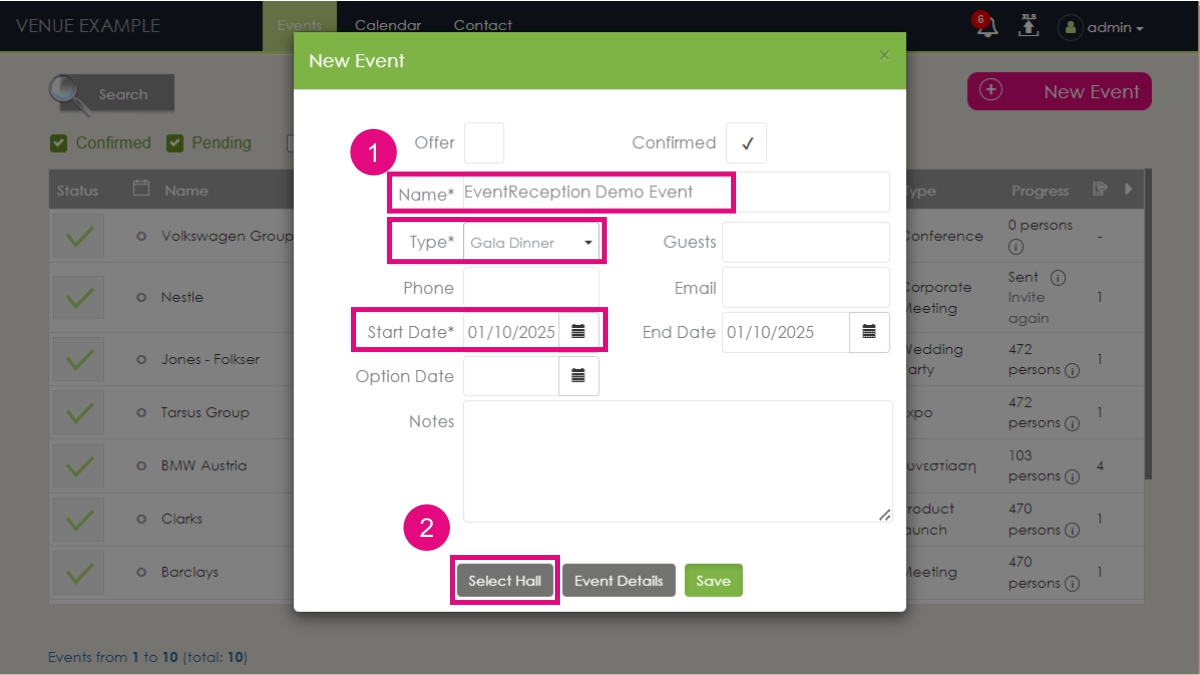
- ✓ Event Name
- ✓ Type
- ✓ Date
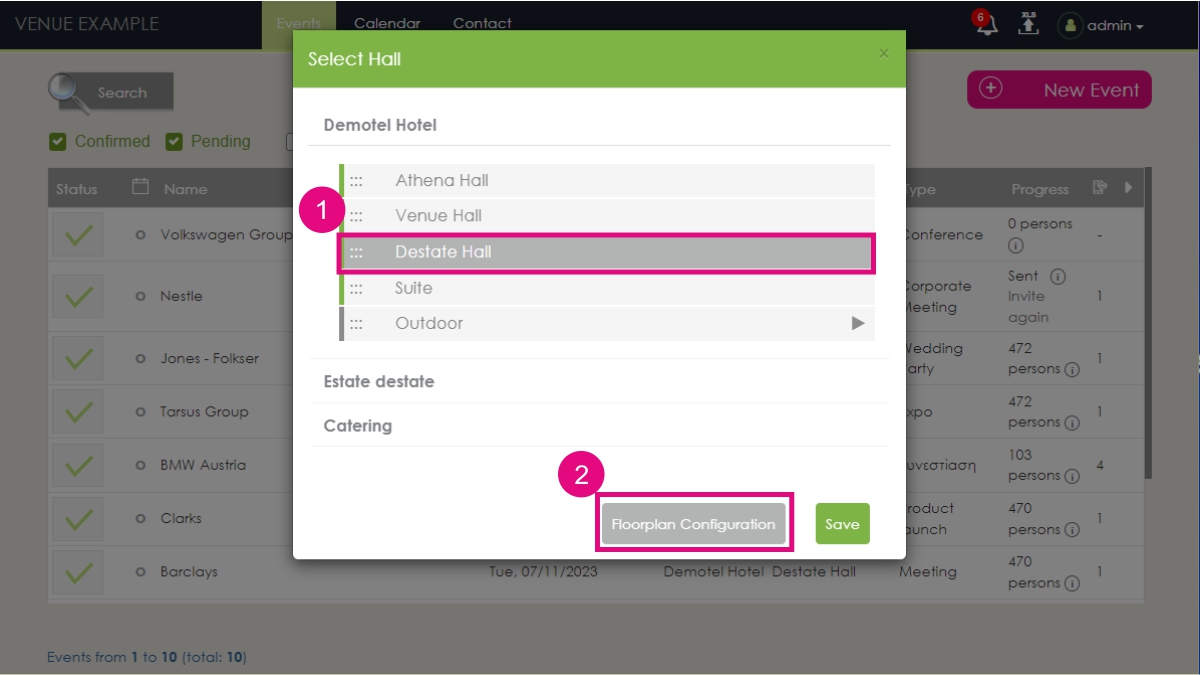
In the Select Hall window, all the event spaces (rooms/Halls & Sub-Halls) you have on your corporate account are displayed.
c. Select the space(s) you want and click [Floorplan Configuration]. In a few seconds, the space(s) you have selected will be ready to set up for the new event.
Step 3. How to create the event floor plan diagram
You can set up the event diagram right away!
Main Idea: Click and Click
After completing Step 2, you automatically find yourself in the floor plan setup window, with the Table & Seats Menu (on your left)already selected.
Click to select a table (or any other object). Move your cursor to the floor plan,and click once again to set it where you want.
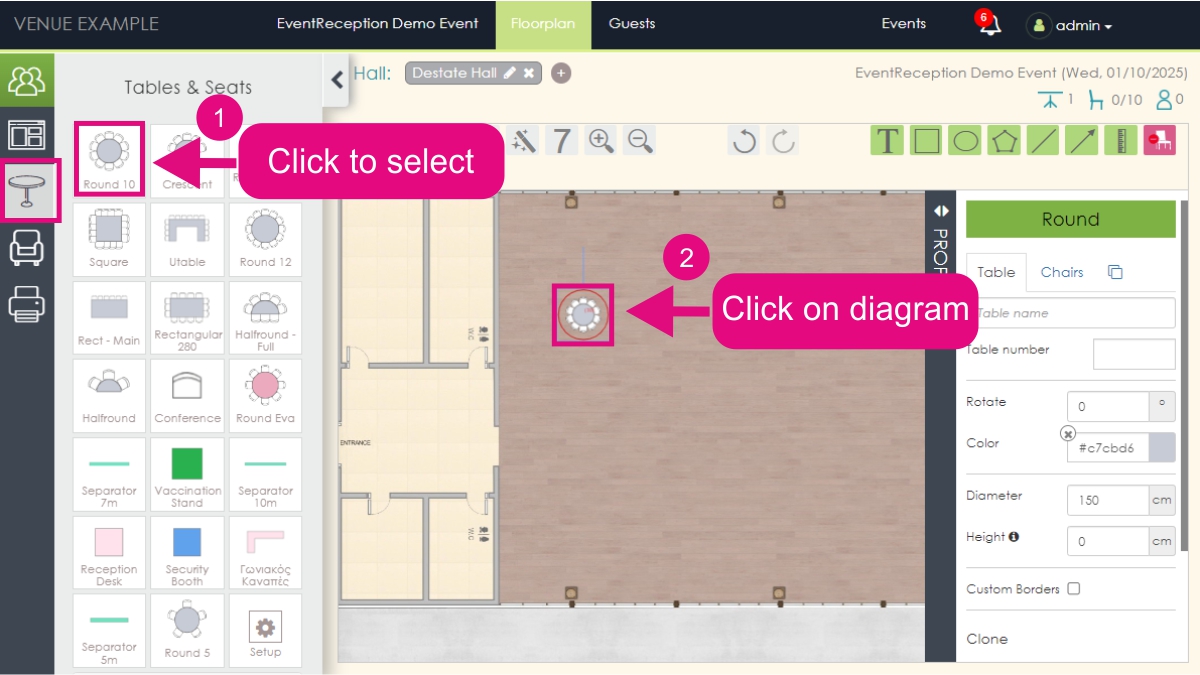
There are several ways (copy-paste, mass-clone, click ‘n drag, etc.) to place objects in your floor plan diagram more quickly.
By far the easiest and fastest way though, is to use a Template to immediately load a whole diagram layout you have already saved in the past.
Even though this post presumes that this is the first time you access the software, we will nevertheless show you how easy it is to use a template.
How to use a Template
By clicking on Templates, you can see all your saved layouts/templates. If you mouse-over you can preview each Template.
After finding the Template you want, click [Load Template] to load the event diagram for the event you are working on.
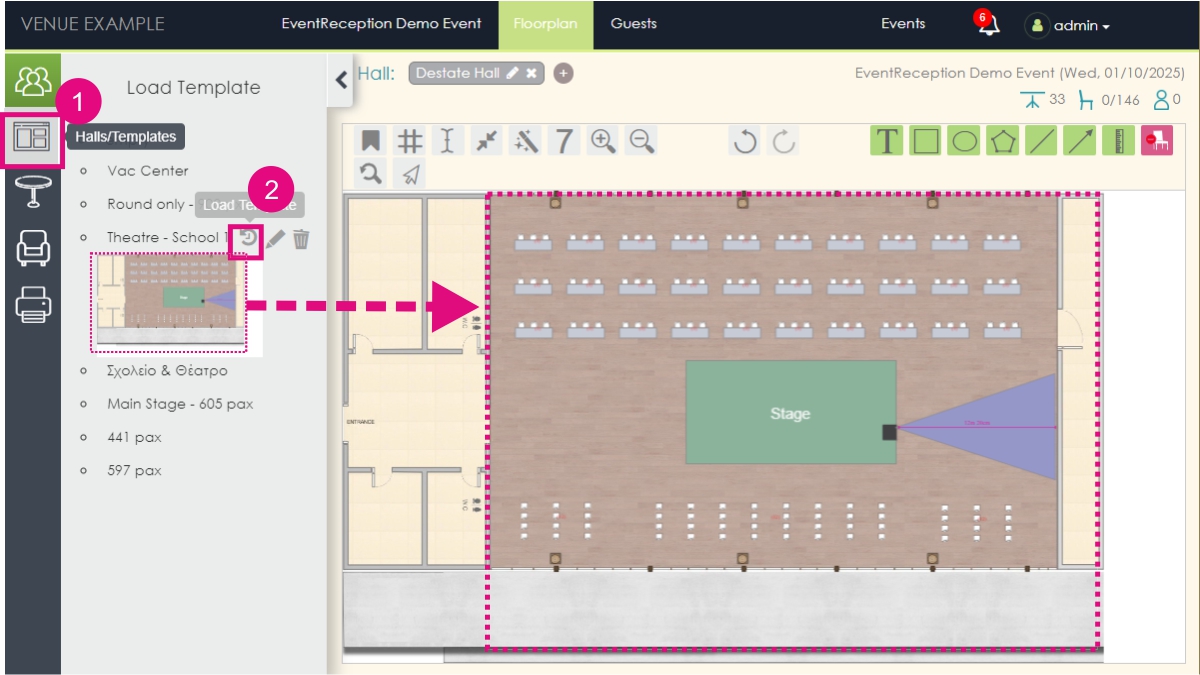
You can use the loaded layout as is, or make any further changes you want.
Step 4. How to number tables
To number the tables of your floor plan diagram fast:
- 1. Click on [Table Numbering]
- 2. Click and drag your cursor over the tables in the order you want to number them.
- 3. Click [DONE] when you have numbered the tables
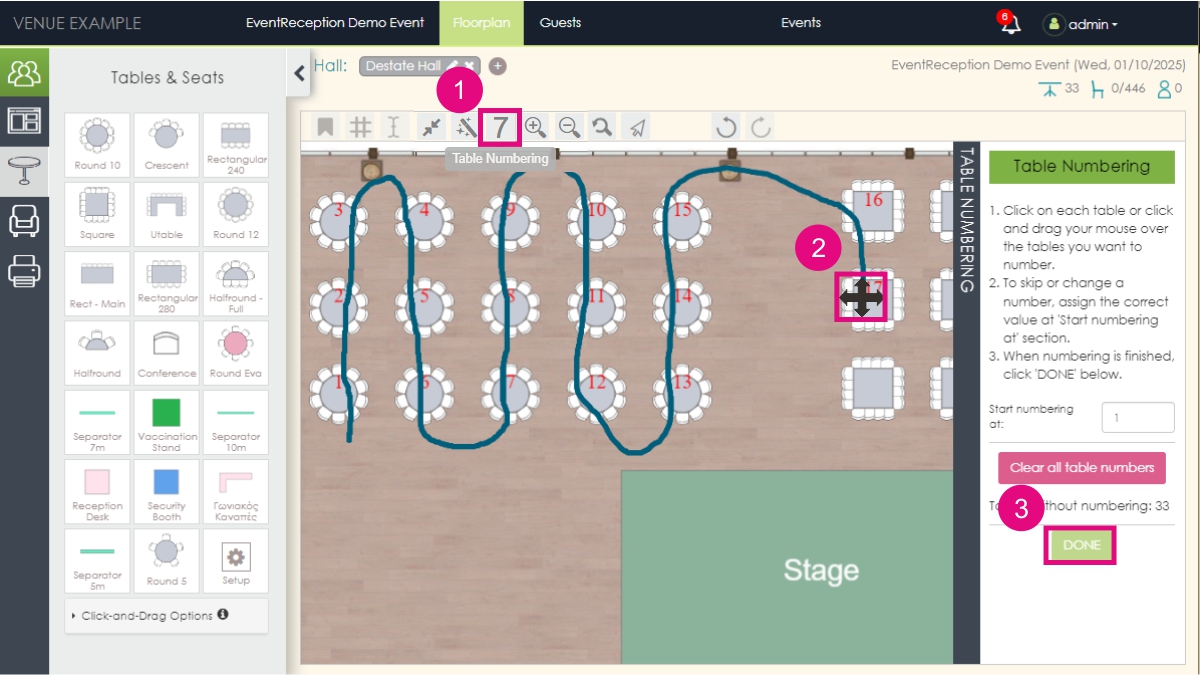
Both table numbers as well as table names (if provided) can be saved in your Template layouts.
Step 5. How to send a client invitation
To send a client invitation:
- a. Click on your [Company Name] (‘Venue Example’ in this case) or [Events] to go back to your Event
Dashboard.
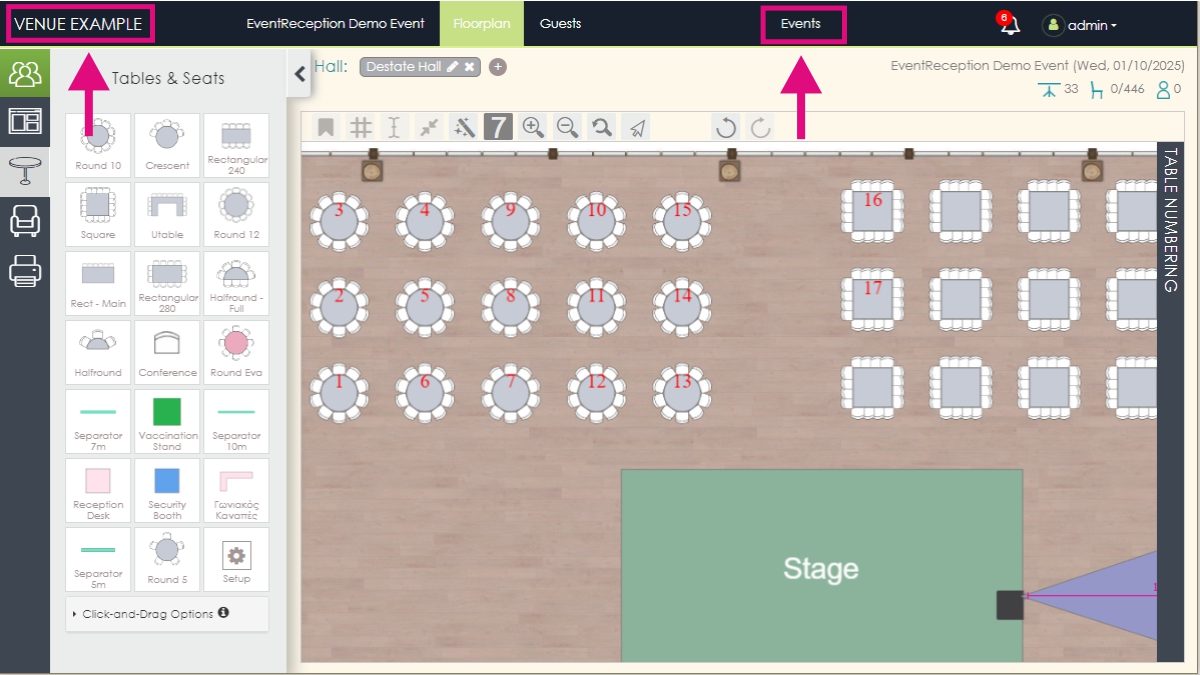
Step 5a. How to go back to your Event Dashboard - b. Click the [Invite] link of the event you just made.
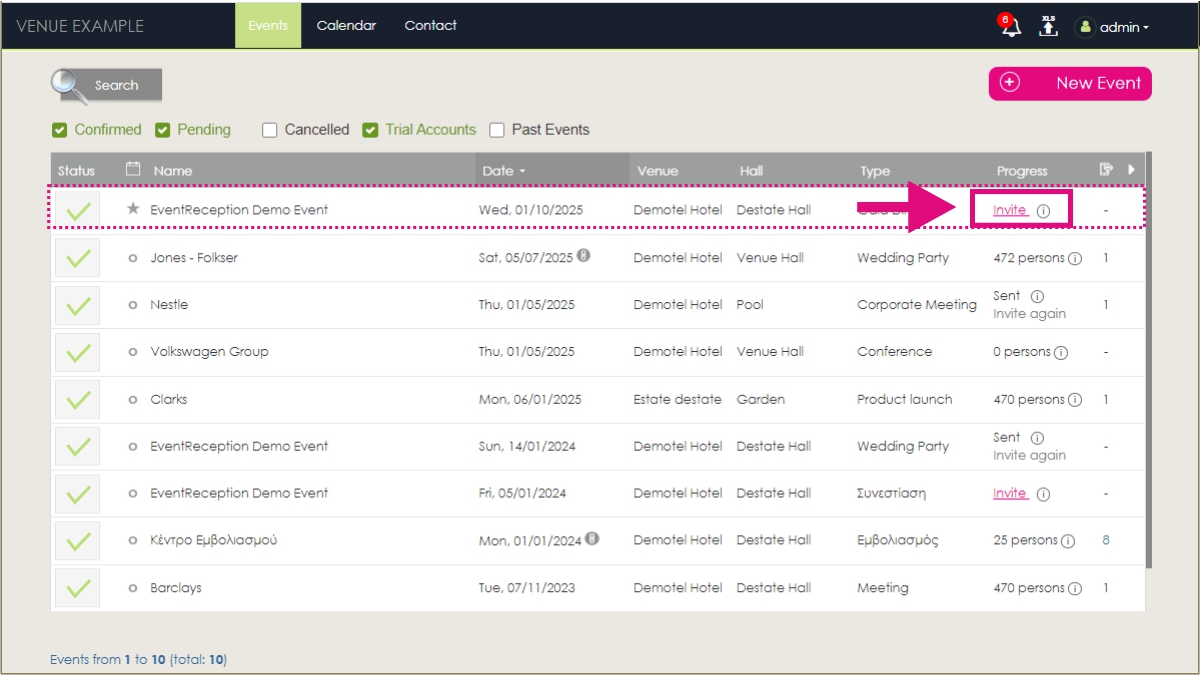
Step 5b. Click on [Invite Link]of the event you want - c. Fill-in your client’s email (if you haven’t already done so), optionally edit your default text to personalize it and/or add/delete any info, and hit
[Send].

Step 5c. Fill in your client’s email, personalise your message and hit [Send] to email your clients their access link
That’s it!
Your client will subsequently receive an email with a link to their account that will take them to their event diagram.
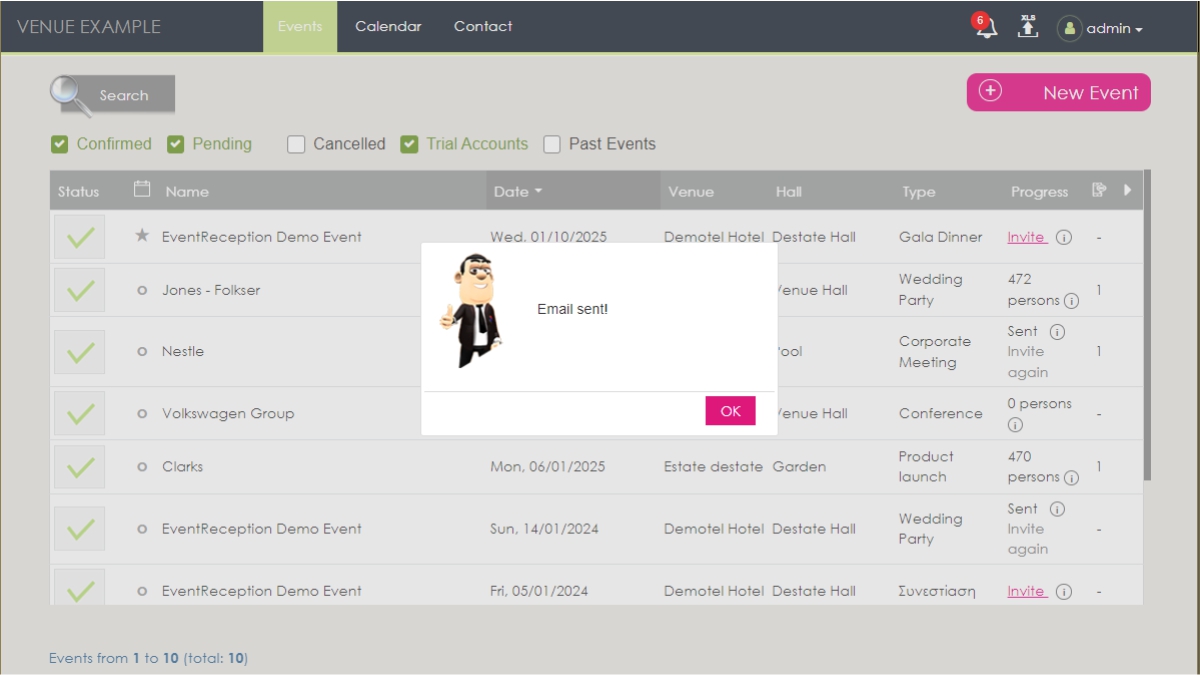
Naturally, you can also export your event diagram to pdf to email it to your clients as an attachment.
Check out the video below to see these steps in action.
From your initial login to sending your client invitation link, it takes less than 2 minutes!


