The View-Only Link Plus New Features for Event Planners & Caterers
v3.4.0 – 3.4.6 (Rel: Apr 2023 – Jun 2023)
v3.4 introduces the View-Only Link and lets you add custom objects to your diagrams, Object Library, and Equipment List, making it very easy to manage event rentals.
Additional features were added to the event management module, while the software’s usability, speed, and security have been further improved.
v3.4 In A Nutshell
❣ View-Only Link
With the View-Only Link, you can share your event diagrams instantly, without going through the tedious steps of exporting your event diagrams to PDF, and then emailing them as attachments to your clients and team.
With a couple of clicks you now send a “live” View-Only Link of the event diagrams, that gets automatically updated with every change you make in your diagram.
☛ Click To See A View-Only Link
Indicative Screenshots
❣ Add New Objects
You can now add new custom objects, furniture and equipment to your Object Library or create them directly from within a floorplan diagram. All objects included in an event plan, show in your event’s Equipment List automatically.
This is particularly useful for event planners who regularly work with event rentals.
Indicative Screenshots
• Add Custom Objects to Object Library
• Create Objects By Renaming and Resizing
• Create Objects With Shape Tools
❣ Duplicate Events
Create a new event by duplicating all the event details of an existing event, or duplicate its client details only.
Indicative Screenshots
❣ Improved Speed & Security
Event diagrams now load even faster. Further security enhancements have also been implemented, particularly in the end-client environment.
v3.4 Analysis
❣ View-Only Link: No more printouts, PDFs & email attachments
Until Now…
Until now, when you wanted to share an event floor plan diagram with your clients and team, you needed to export the diagram in PDF and email it as an attachment.
Every time you had to make a change, you had to email another floor plan version attachment, hoping that nobody gets lost in the midst of the different version plans.
Introducing The View-Only Link
With the View-Only Link we put an end to this problematic, and now outdated, process.
The View-Only Link gives users direct access to the latest version of the floor plan diagram, as per your latest modification. In other words, it automatically keeps everyone on the same page … or the same diagram
Users access the always updated diagram with a single click.
Click To Try
Check out how your approved users view their event floor plan diagrams with a single click.
PDF Exports From View-Only Link
View-Only Link users can always export their diagrams in PDF if they wish.
They can also customize the exported diagram, adjust its zoom level, select different print areas, as well as choose which floor plan elements to show/hide (up to 9 different ones).
Equipment List & Seating Charts
In addition, View-Only users can export the event’s Equipment List as well as check the seating charts in case seating has taken place.
Create View-Only Link In 3 Seconds
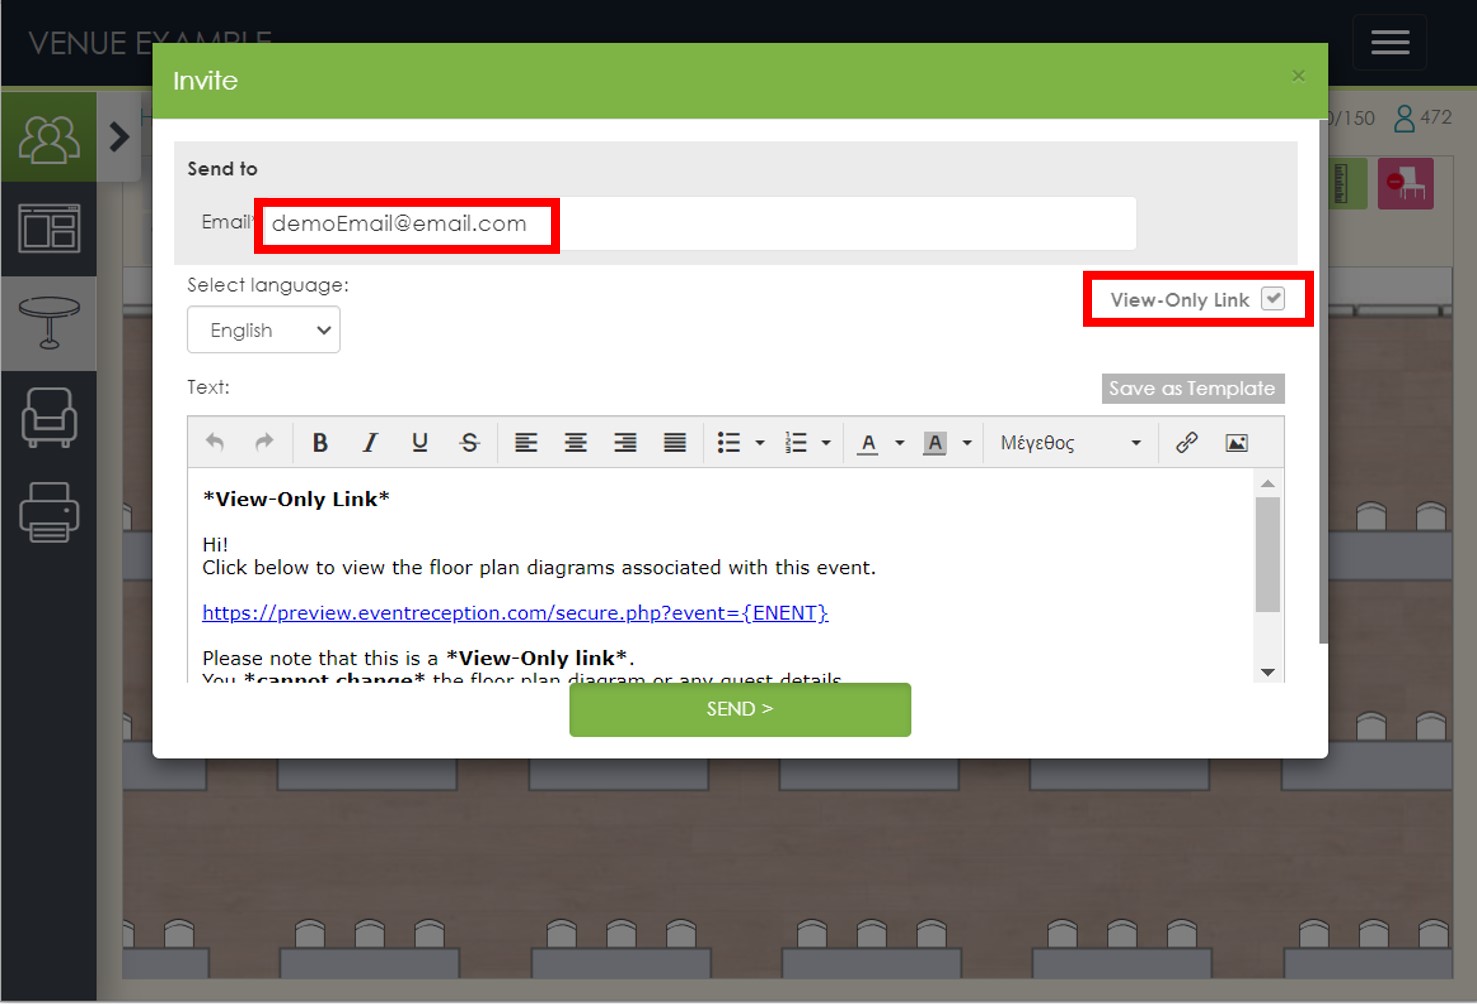
Create and send an event’s View-Only Link by clicking on the chain (View-Only Link) icon from within an event’s floor plan screen.
The View-Only invitation window will pop up. Type in the desired email, optionally edit the default invitation message, and click [Send].

Manage View-Only Links
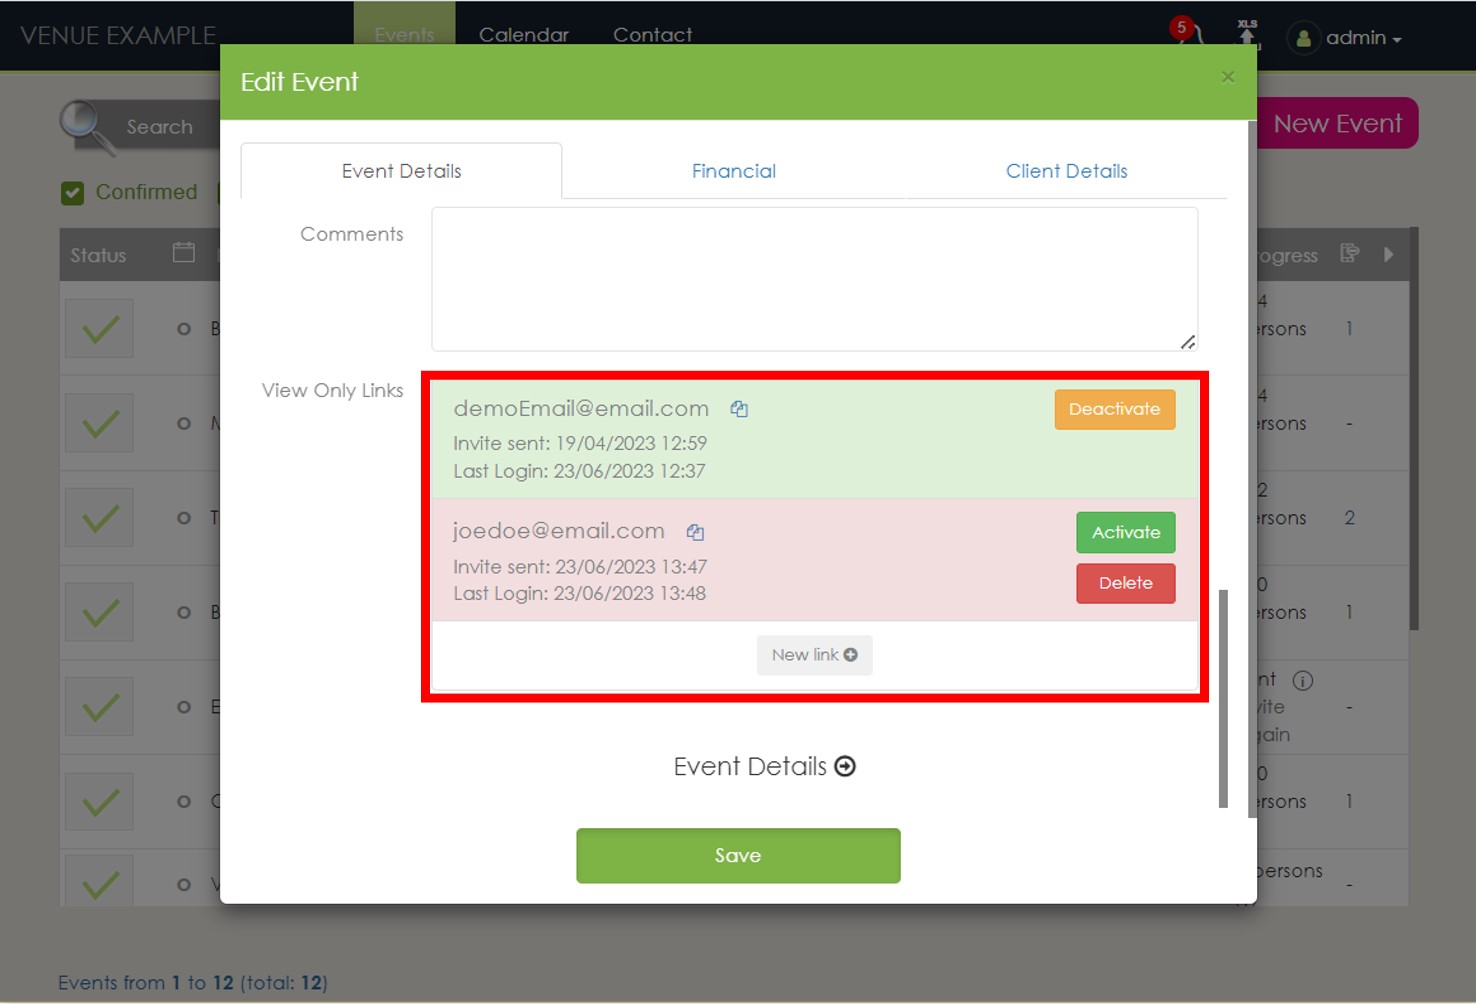
Manage an event’s View-Only Links from an event’s Edit Window. You can deactivate or re-activate any given link, delete it or create new links, as well as track when the invitation was sent, and when was the last login.

❣ Add New Custom Objects to Object Library
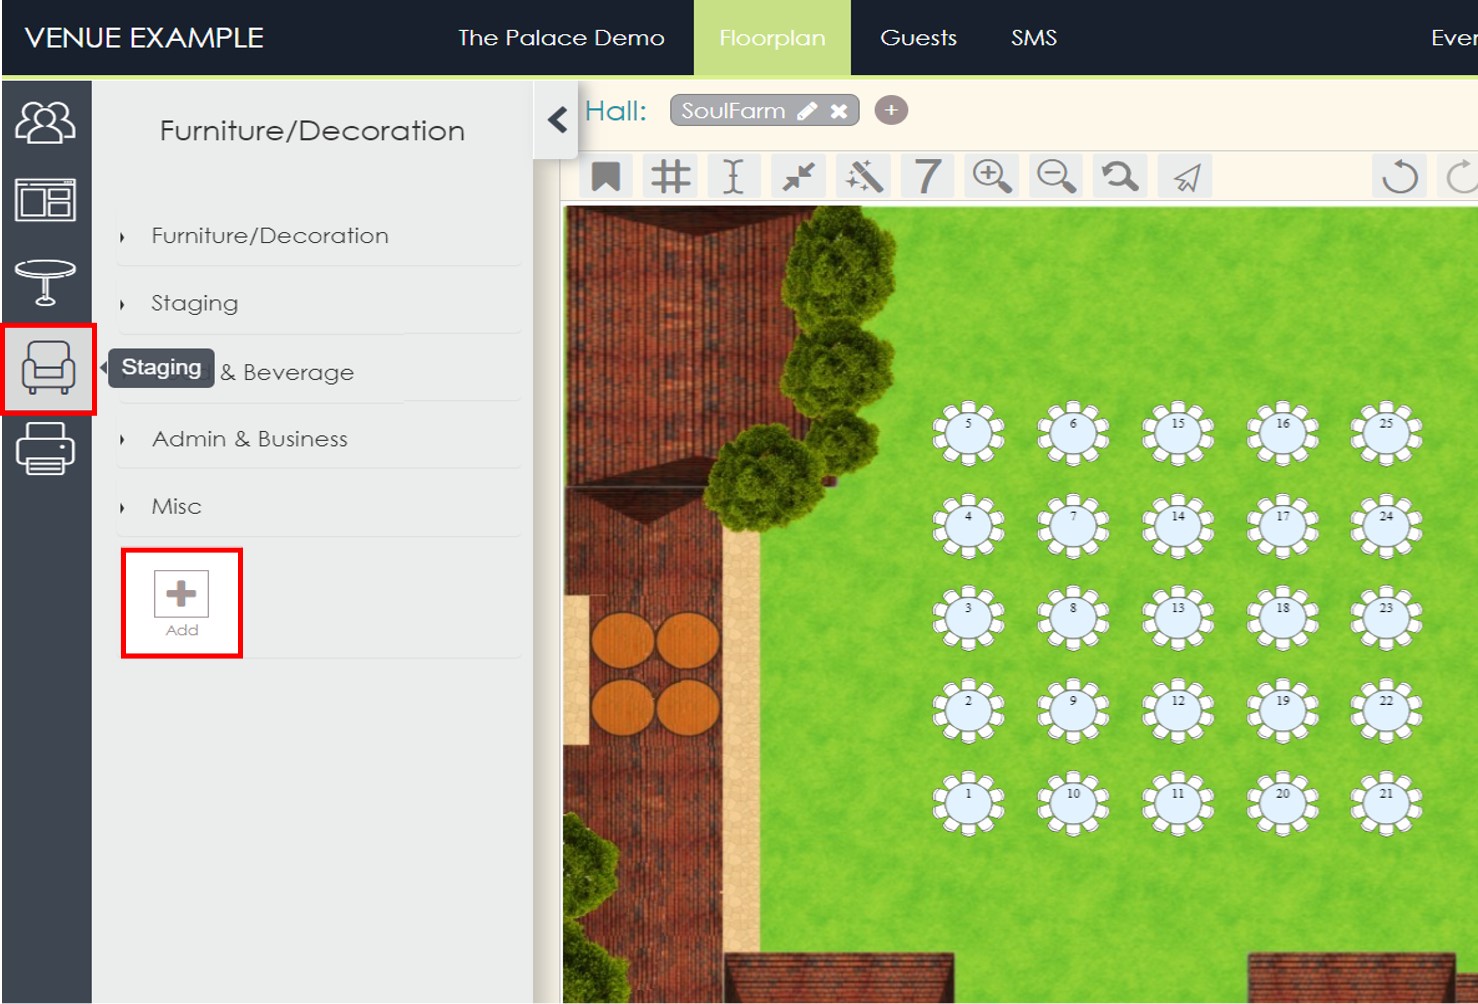
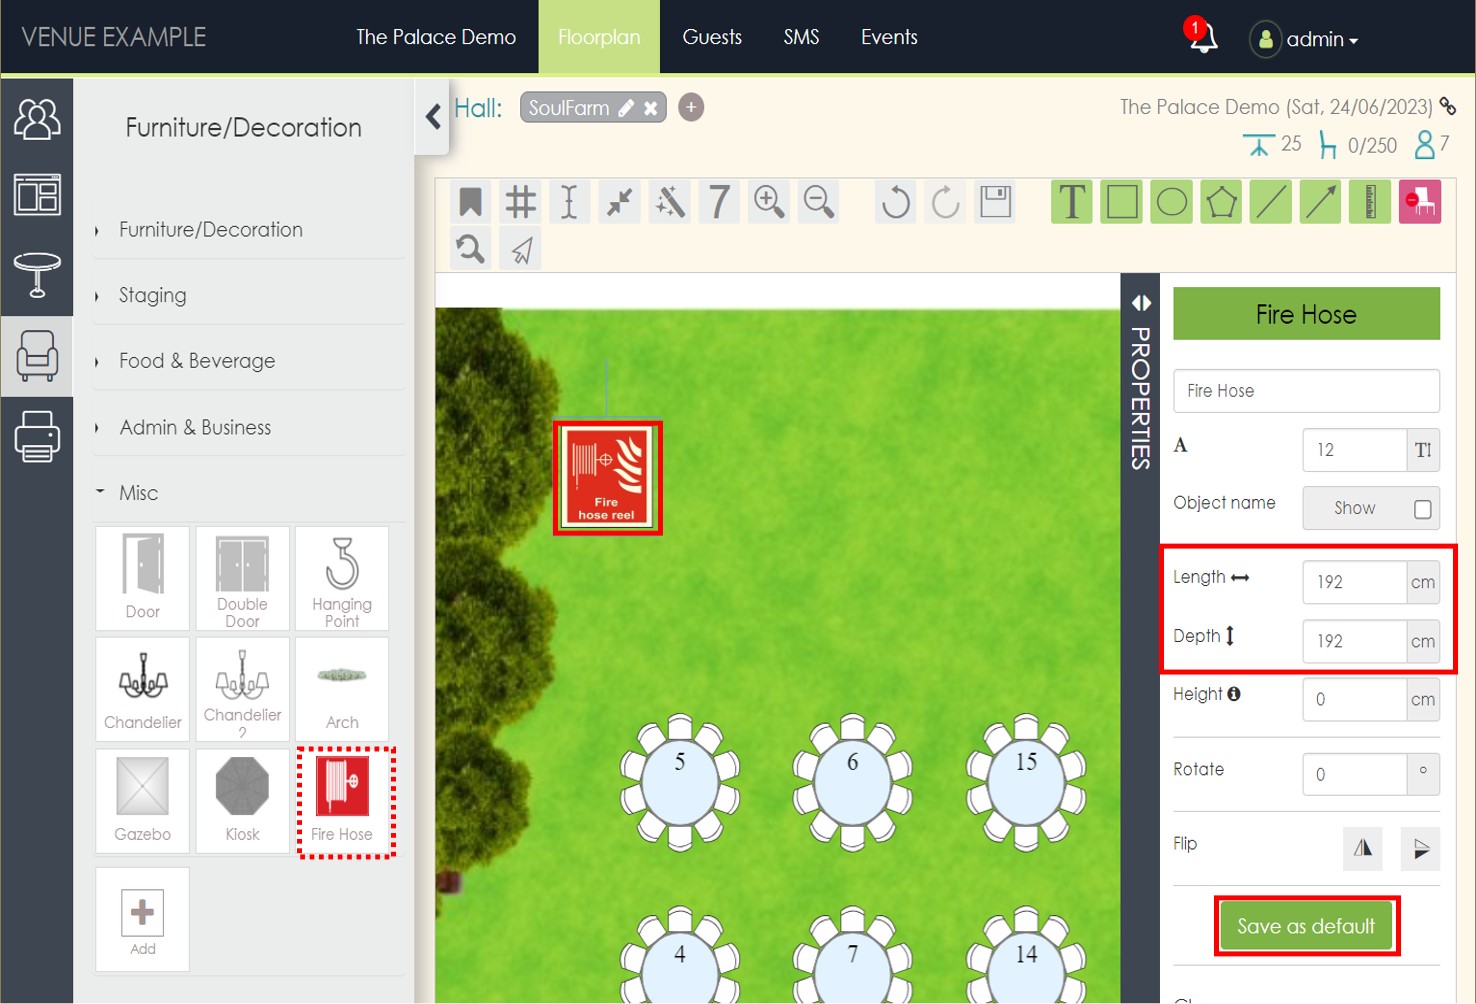
You can now add new custom objects to your Object Library, in any category you want (Furniture/Decoration, Staging, Food & Beverage, Admin & Business, Misc).
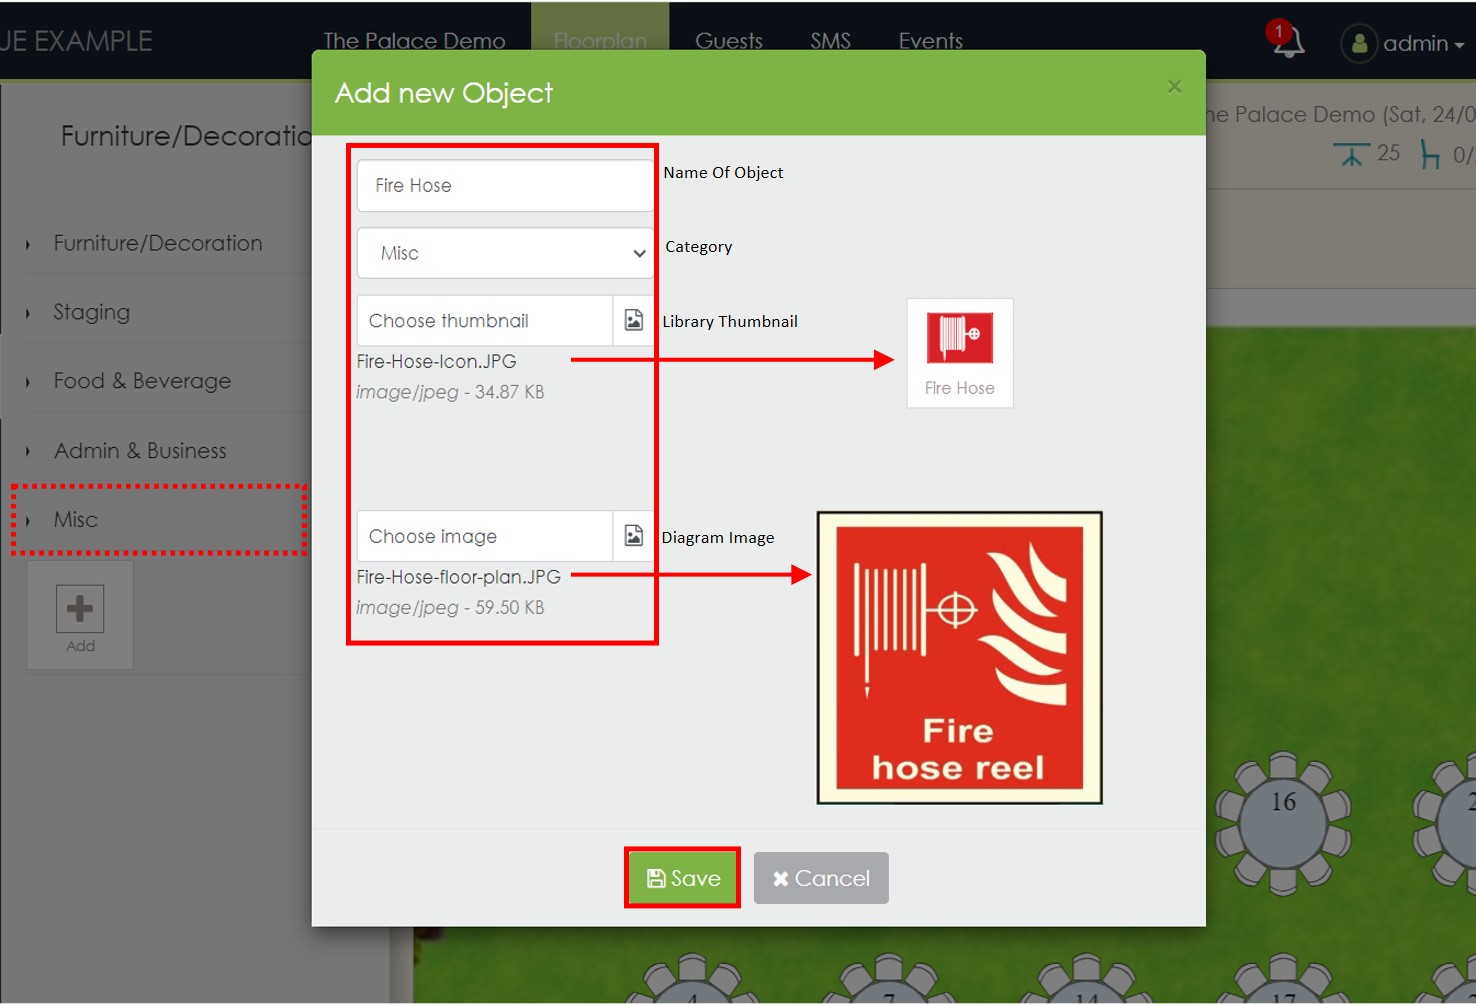
Simply go to [Staging], click on [Add], type in the desired Name, choose its Category, and upload your desired images.

For each new object, you upload a thumbnail image for the Object Library, and a main image for the floor plan diagram.

The uploaded images can be in any popular image format (e.g. jpeg, png, svg etc.) and can have any dimensions since they are optimized automatically.
Once the new object has been added, you can set its dimensions from the Properties window and click [Save as default] to save.

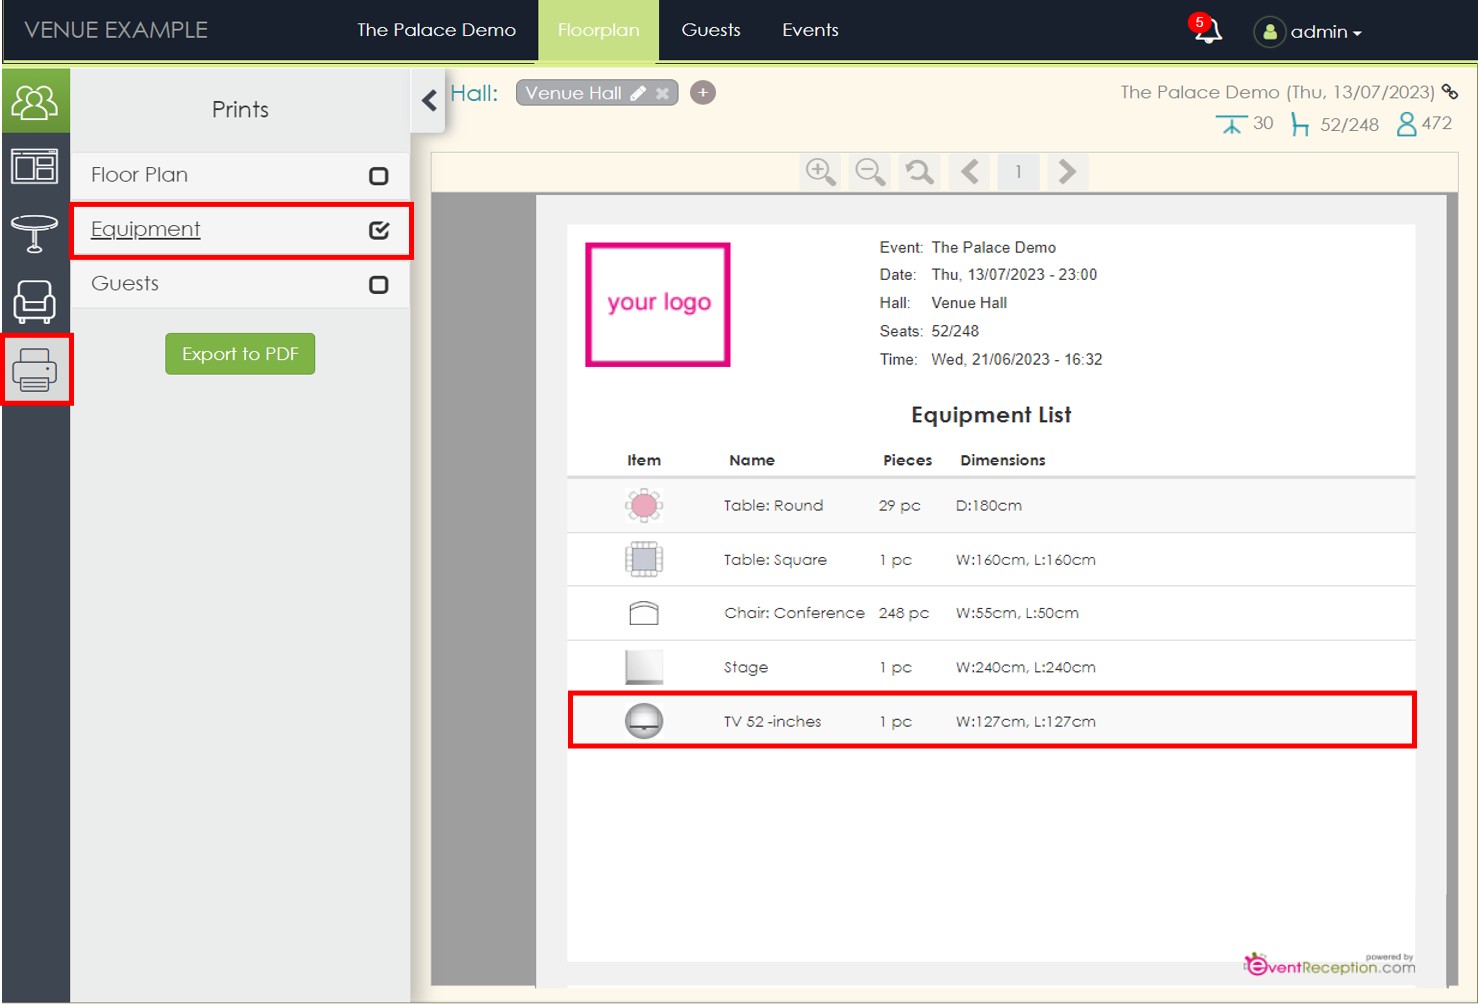
All objects inside an event diagram show in the event’s Equipment List automatically.
You can naturally add any new objects you want including for example logos, photos etc.
❣ Create New Objects Faster By Renaming and/or Resizing
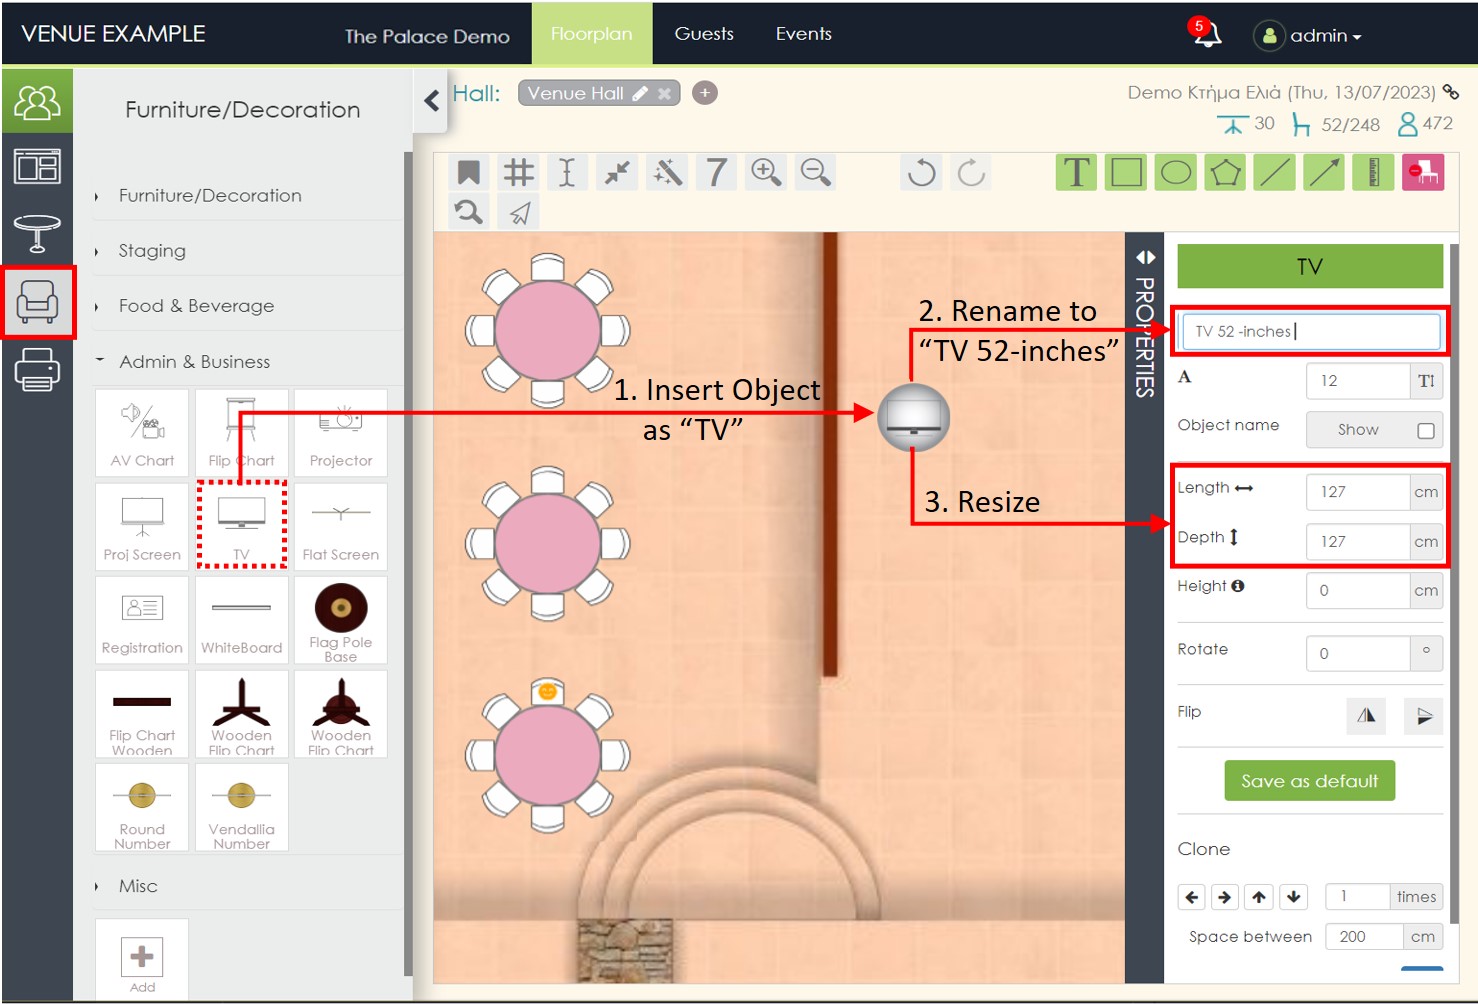
An even faster way to create new objects, is to use existing library objects and simply change their names and/or size.
For example, if you have multiple different TV-sets in an event, you can depict them all using the same TV Object: Click to select the TV Object from your Object Library, click to place it in the floor plan, and change its name and/or dimensions as per the actual TV-set you will be using.

The new TV-set will automatically show as a separate entry in your Equipment List, as per its new name and dimensions.

You can subsequently copy-paste the new TV object, to use it as many times as needed in your diagram.
❣ Create New Objects With Shape Tools
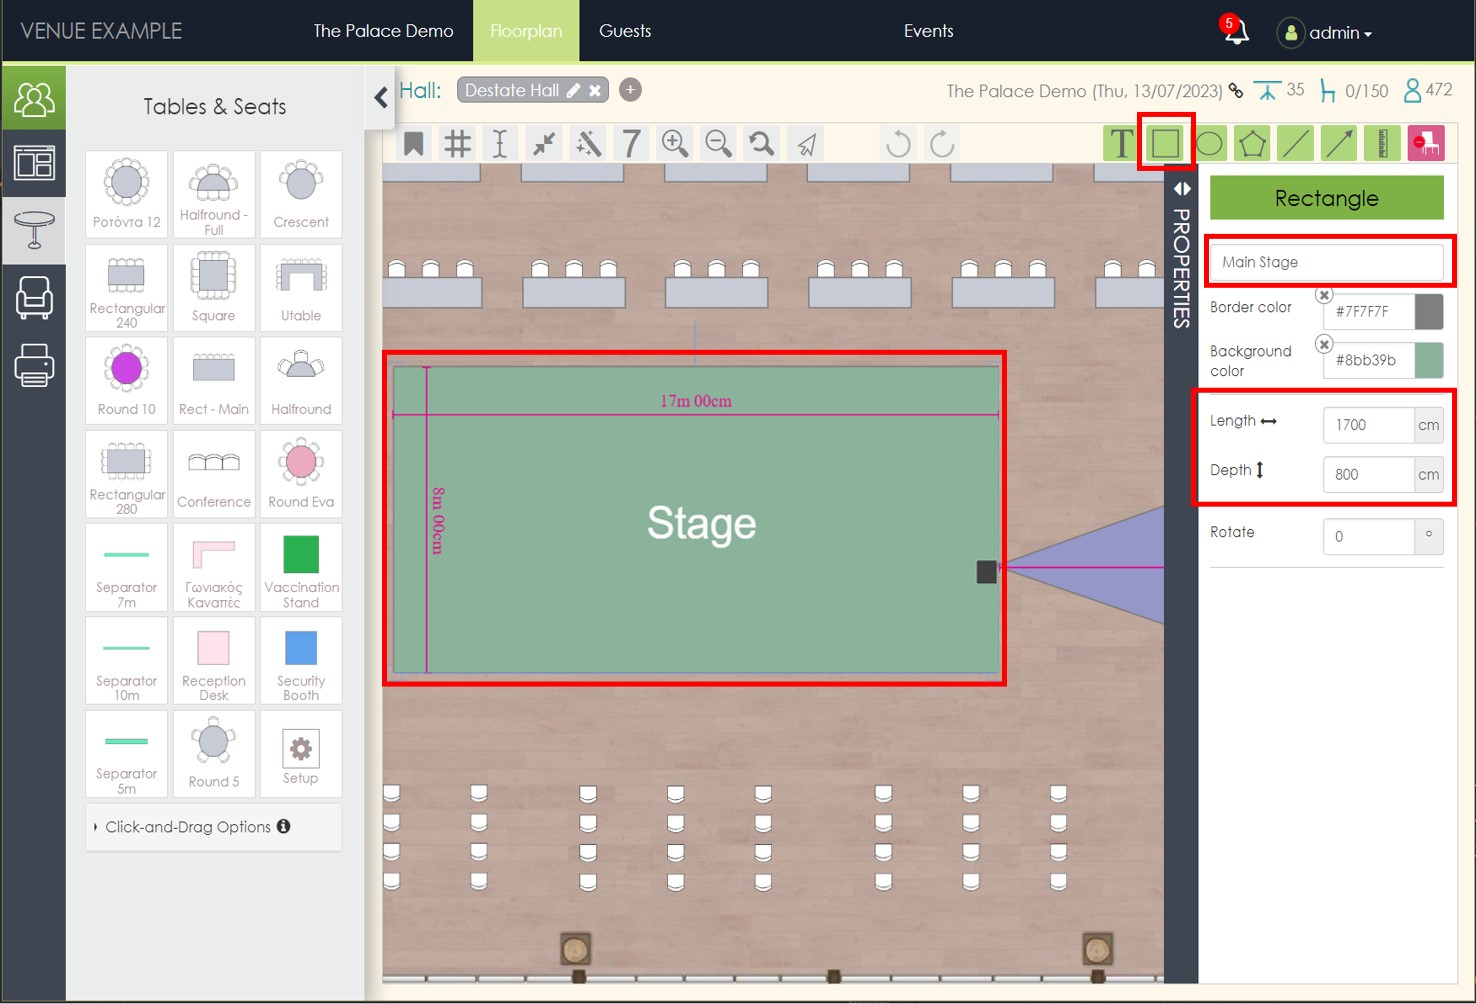
Yet another way to create new objects fast, is by using the (green) shape tools.
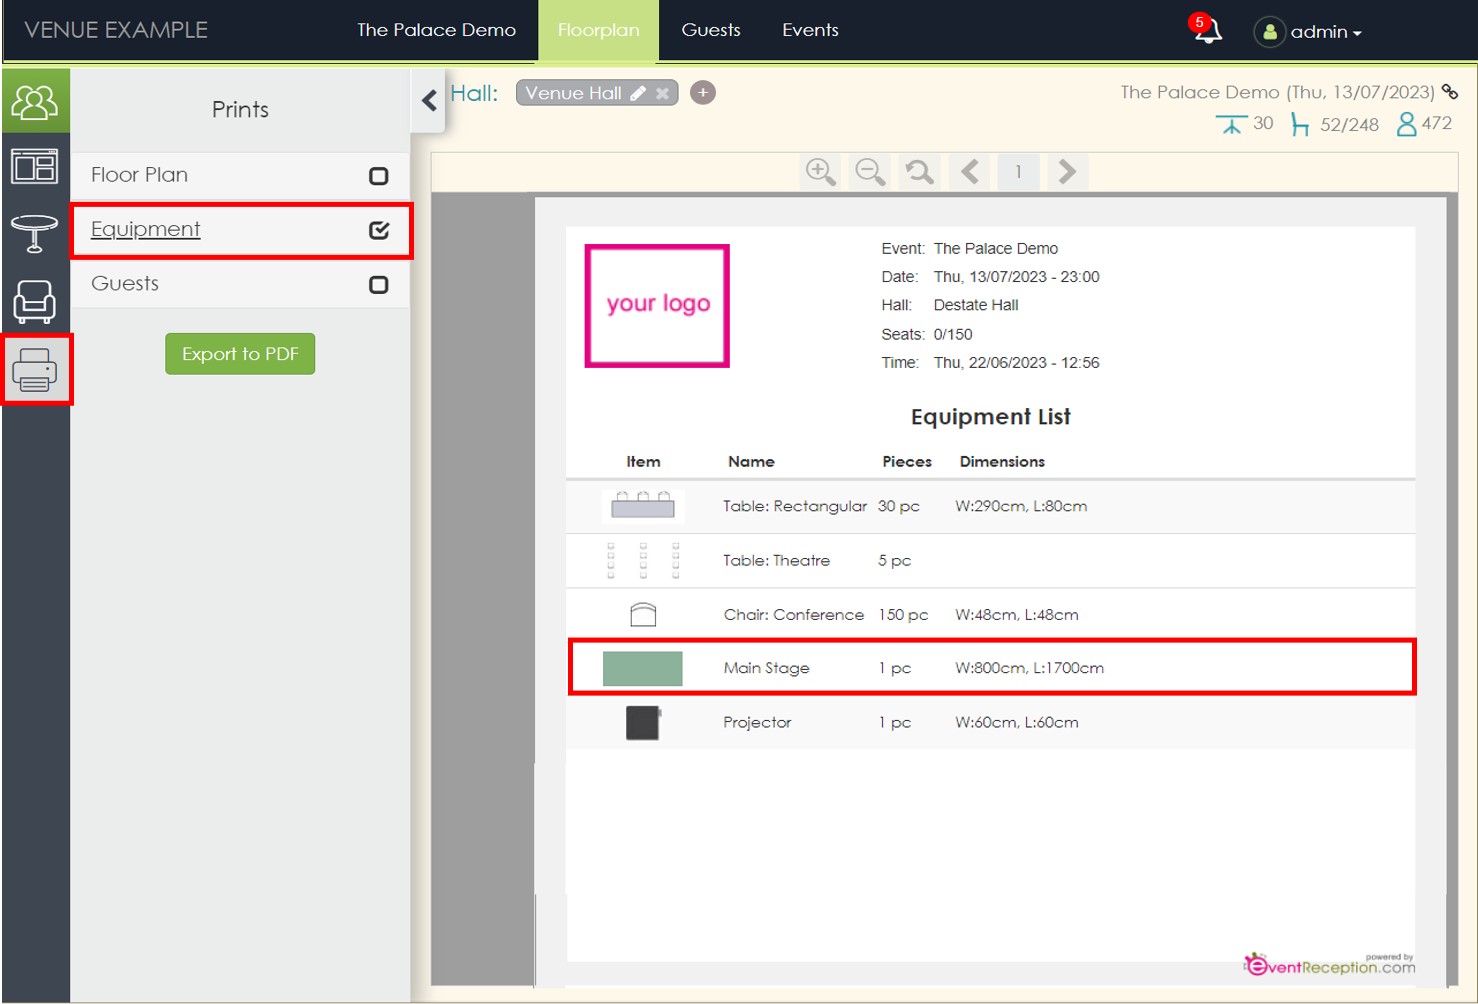
In the following example, we use the rectangle to create a Main Stage with dimensions 17m x 8m.

By merely naming the rectangle, (“Main Stage” in this example), you automatically create a new object entry that shows in the Equipment List, as per its specified name and dimensions.

An added advantage of creating objects with shape tools is that you can easily change their colors and border lines.
❣ Duplicate Events
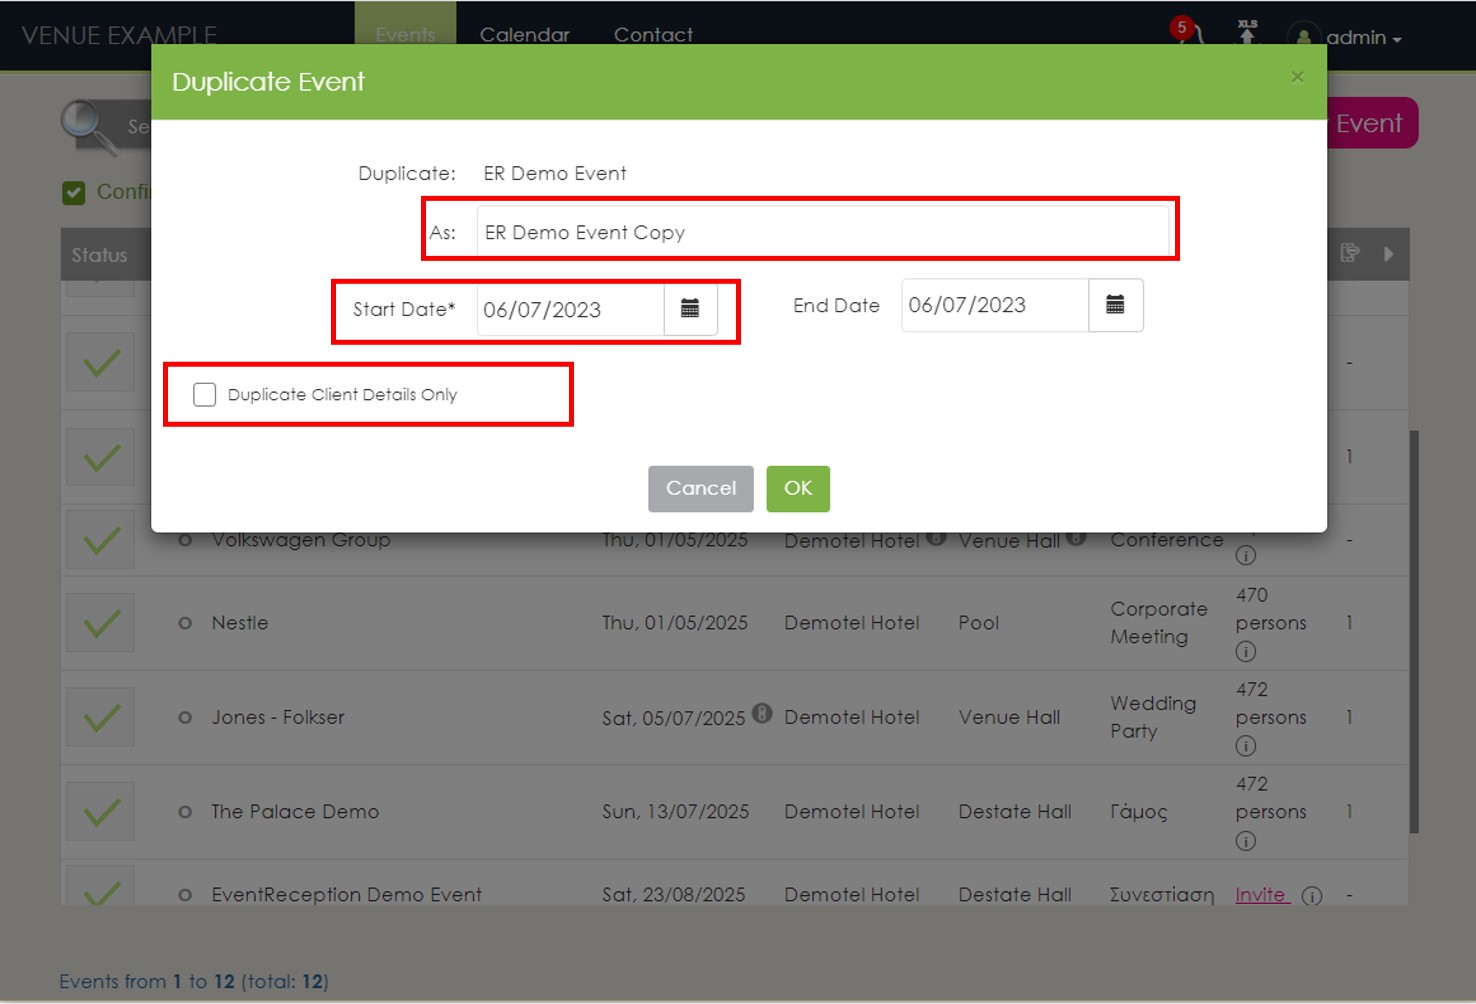
Create a new event by duplicating an existing event. This is particularly useful when the same client books multiple events.
From your Main Event Dashboard, hover over the event you want to copy, and click “Duplicate”.
Pass in the new Event Name & Date and hit OK to duplicate. A new event will be created duplicating all the information of the existing event, but allowing you to edit them.
If you want to duplicate the client (corporate) details only, check the “Duplicate Client Details Only” box.

❣ Remaining Upgrades & Fixes
❣ Increased Speed
Event diagrams load even faster, ensuring an even better user experience.
❣ Improved Security
Important security enhancements have been implemented with emphasis on the end-client environment.
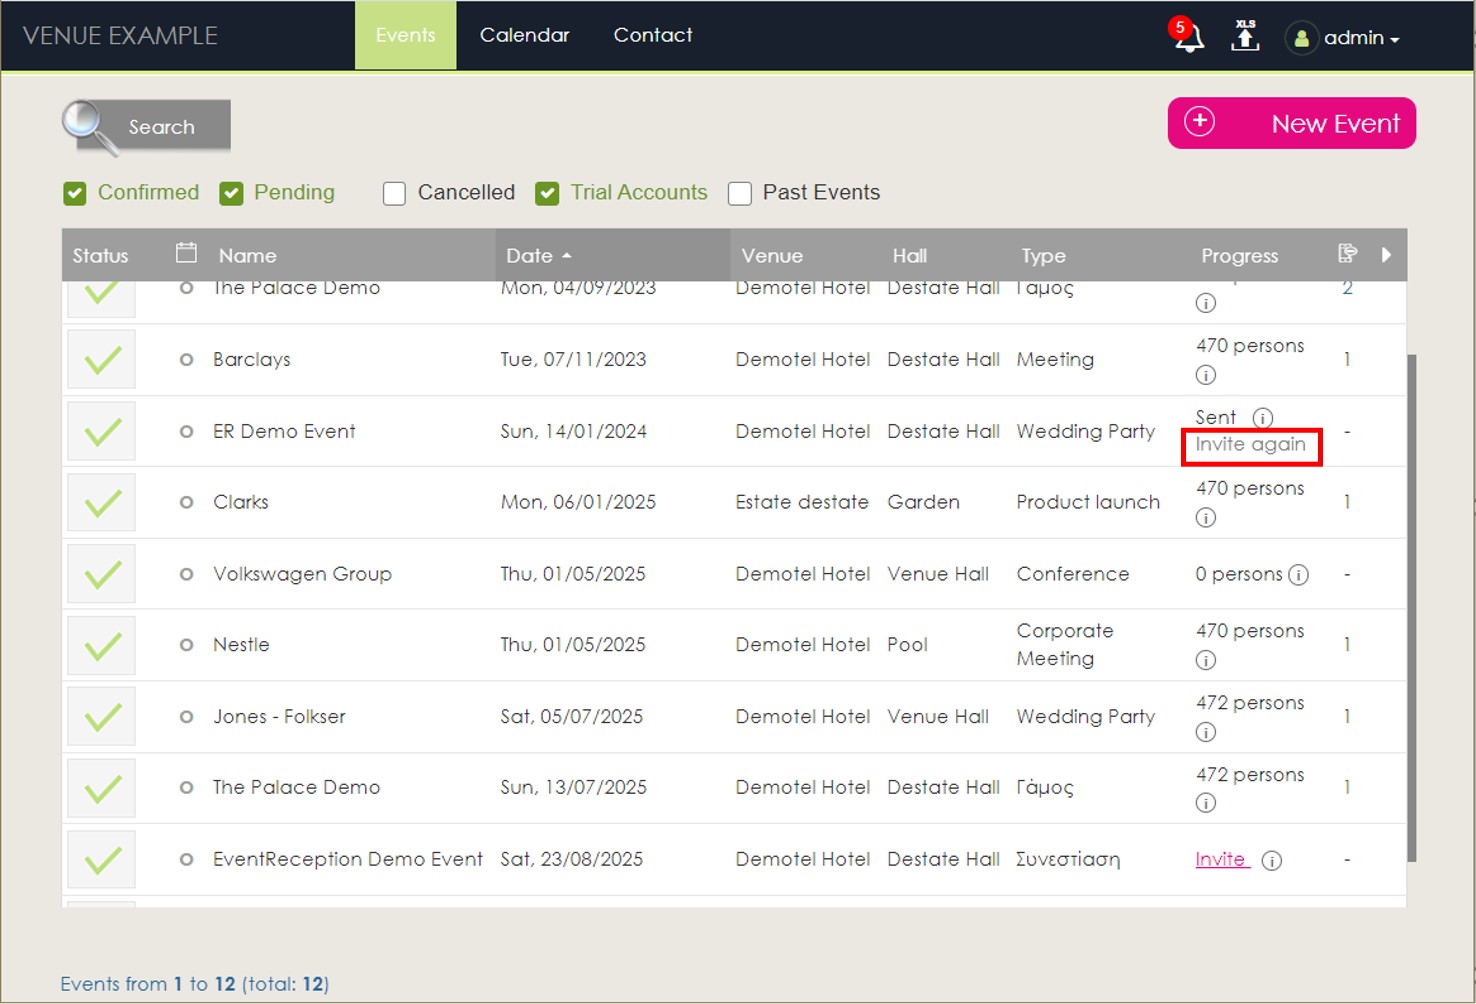
❣ Invite Again Link Keep Same Token
“Invite and “Invite Again” link tokens now remain unchanged without compromising user-access security. End-users no longer get confused with expired link tokens.
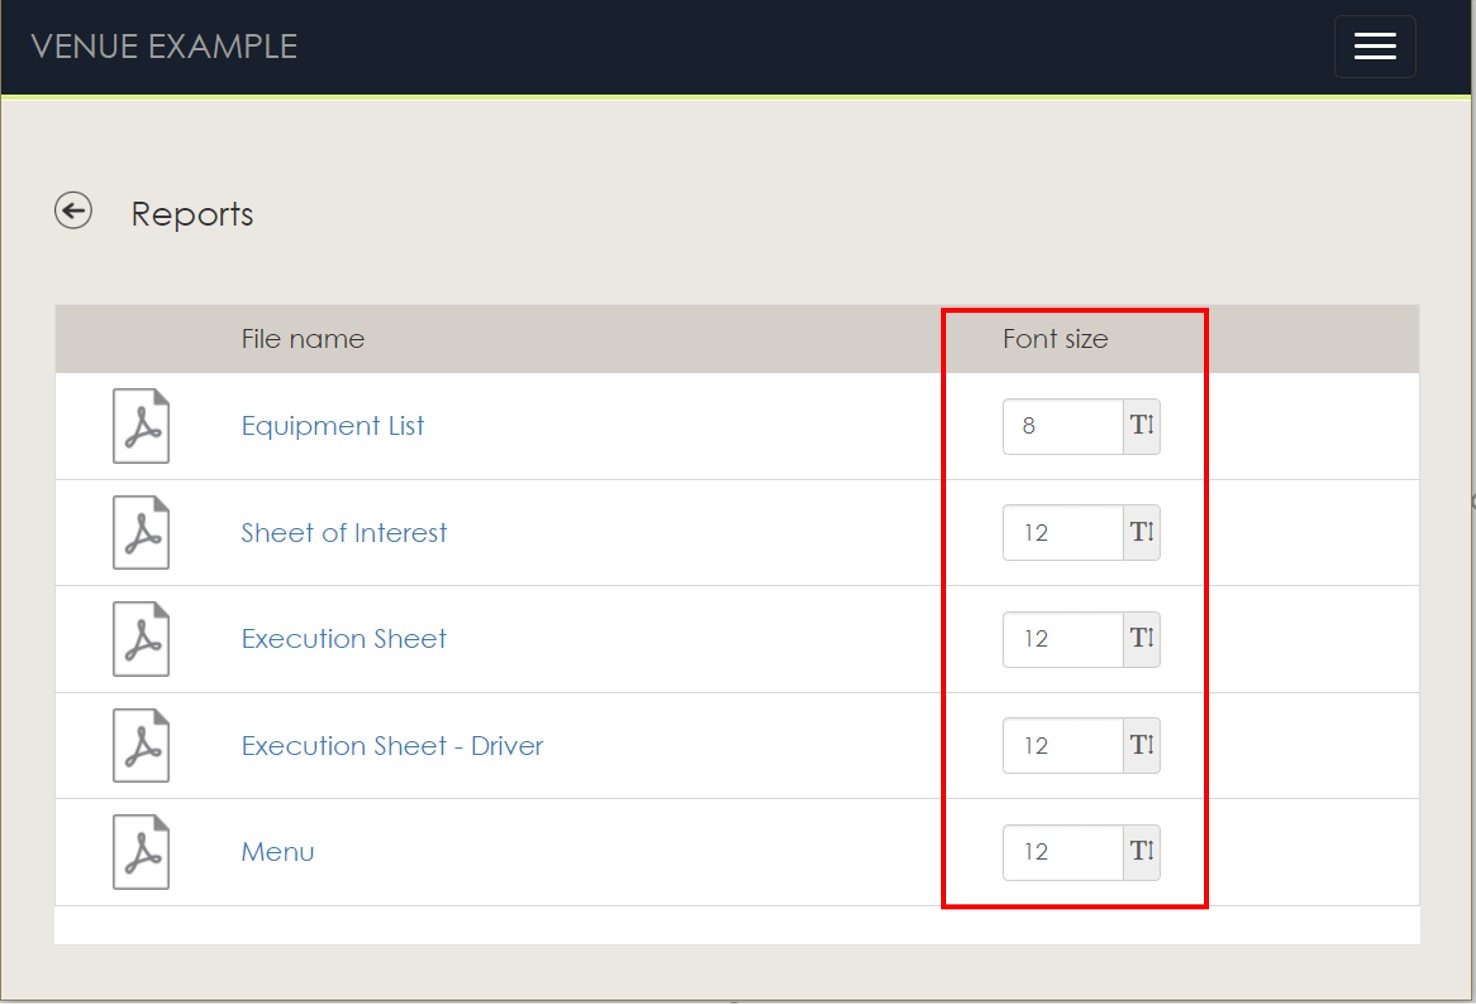
❣ Printouts – Variable Font Size
You can now set your preferred font-size for your printout reports.
❣ Icon Of Babies – Red
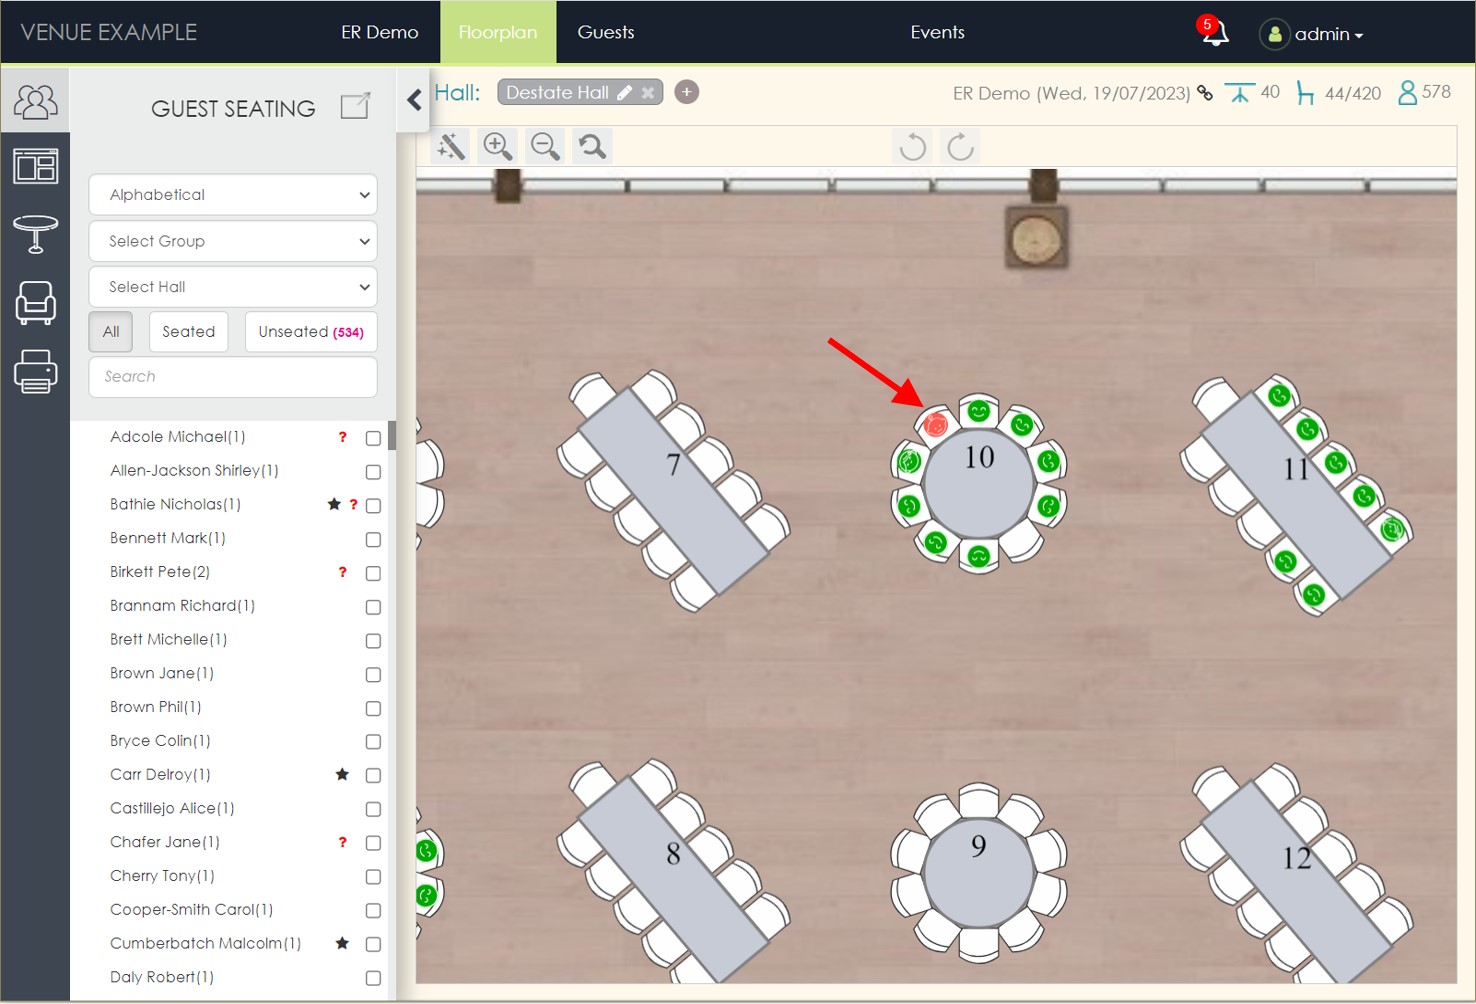
The background color of Babies in the seating charts is now always red. This helps distinguish them immediately, since they often need special care. For example, they might be needing high chairs or boosters instead of regular seats.
❣ Login Fix
Sometimes when end-users made their initial login over a mobile phone, they could experience subsequent login problems. This has now been fixed.


